Sunday, January 31, 2010

Teal Appeal - Diamond Cosmetics Don't Teal My Heart Away

Number two on my list of polishes on my search for the perfect teal was Diamond Cosmetics Don't Teal My Heart Away.  Well it was the second one I decided to test, between finding it and it arriving at my doorstep I stumbled on a few others, more on them later.  Don't Teal My Heart Away is significantly lighter and greener than RBL Teal so I was hoping it would be the shade I was looking for.  I hadn't tried Diamond polishes before this one so I wasn't really sure what to expect, their web site swatches frankly suck. Luckily there are MANY other nail polish crazed bloggers out there and I was able to find several good swatches.  

When the polish finally arrived (it took almost 2 weeks, though they shipped it the day after ordering) I was thrilled.  The color was a lot lighter than I was expecting in the bottle but as soon as I got it on my nails I was struck by how amazing it looked and how well it applied.  Seriously, I could have done just one coat and been thrilled with the color, the polish just flowed off the brush.  A word of warning, I like thicker polishes so this might seem thick to some people initially.    
 
Don't Teal My Hear Away (2 coats) and topcoat

So there I was with probably the most amazing color I have ever worn on my hands, admiring them, showing them repeatedly to my husband (even he agreed it was glorious) and then I realized that as perfect as Don't Teal My Heart Away is, its still not the color I was looking for.  Still not the elusive cowl neck sweater teal, so I have to keep looking.  I am ordering 3 bottles of this stuff.  This is officially my new favorite polish. 

After two days I chipped the polish but I wasn't ready to take it off yet (unheard of) so I painted over the chip with a fresh coat and then topped all of my nails with Sinful Colors Nail Junkie.  I have a love hate relationship with Nail Junkie, up until this point I love it in the bottle too much to franken with but I hate it on. I think this is the perfect solution.  It was raining so I had to photograph inside and you can't see how amazing this reflects the light. 
  
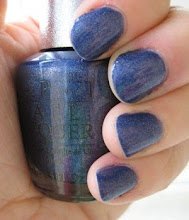
Don't Teal My Heart Away (2 coats), 1 coat Nail Junkie and topcoat


Close up of Nail Junkie over Don't Teal My Heart Away - I am not sure whose blog I saw the circular close ups on but its brilliant and I am adopting it so you guys don't have to look at my gross cuticles.

If you aren't familiar with  Don’t Teal My Heart Away or the Teal for Toes Ovarian Cancer awareness movement you should check out their site here.   Diamond Cosmetics donates $.25 from each sale of “Don’t Teal My Heart Away” to the National Ovarian Cancer Coalition.

Thursday, January 28, 2010

Warlock


I have a confession, I am an addict.  No not to nail polish, ok that too but that's not my confession.  I am a WoW addict.  For those of you that don't know what I am talking about WoW is  short for World of Warcraft a massive multiplayer role-play game...a.k.a. a computer game.  So three nights a week I sit in front of my computer and type and talk through a microphone to 24 other people while we try to kill new imaginary bad guys to obtain digital loot and a gain a sense of accomplishment.  I can't really explain why I do it but I enjoy it most days.

The thing is that there is a lot of wait time associated with getting 24 other people all ready to play at the same time (even though we have a set start time), so most nights I use that time to change my nail polish.  Last week I was sitting at my desk staring at my character and thinking I should make a nail polish that matches her.  Ok I know that is weird but I think she is cute and I like the colors associated with her.  I play a warlock in the game and she typically cast spells and wears equipment in shades of purple, bright green and black.
She casts purple and pink spells so imagine that with the green

Materials:
  • Sinful Colors I Love You
  • Sally Girl Glitter - Fuchsia
  • Chartreuse glitter
  • Chelsea Twilight Purple
  • Fingerpaints base coat (my bottle was half full)
  • Clear Top coat
  • Ballz

  1. Add  1/8 of a bottle Sunful Colors I Love You to the Fingerpaints base coat
  2. Add 2 small funnels each of chartreuse and fuchsia glitter
  3. Add 6 drops Chelsea Twilight Purple (for shimmer)
  4. Add ballz
  5. Top off with clear
  6. Shake well 

The chartreuse  glitter isn't very shinny, it is really sticky and likes to settle.  I really have to shake the bottle before using it.

Though I intended for this to be a sheer polish for layering over another appropriately warlocky color, I thought I would check it out solo first.
Its very hard to see the fuchsia glitter with multiple coats layered.  Three coats with a coat of Seche.

Here is is layered over some random polishes in my stash. 
WnW Black Creme
Rimmel  Night Before
Fingerpaints Sketched and Etched
Pure Ice Splash


I like it over both the Night Before and the Sketched and Etched.  The Night Before lets you see both colors of glitter the Sketched and Etched makes the green stand out more.  I was feeling a little brighter so I decided on the Fingerpaints.

One coat Warlock over 2 coats Finger paints Sketched and Etched and a close up of the glitter
I know its strange but it was fun combining my two addictions. Now when I look at my nails in the morning I will think about goofing off after work and who knows maybe it will bring me some good luck while playing tomorrow night.

Always remember that nail polishes don't always play well with each other.  If you are going to play mad scientist proceed at your own risk and use proper safety procedures....yes I am a science teacher.  I am not suggesting that frankening is risk free and my franken recipes are just me recounting how I mixed up my latest potion. I take no responsibility for your mad scientist experiments. 

Tuesday, January 26, 2010

Teal Appeal - RBL Teal

I searched high and low on the internet for teal cremes and I found only two that seemed teal not turquoise to my eyes.  The first of these was RBL Teal (well duh, google teal and what do you think you get).  Happily they ran a 50% off polish internet sale and my polish buddy was placing an order so she included a bottle of Teal for me as a Christmas gift.  An awesome gift!


RBL Teal one coat, 2 coats Seche Quick Dry

If you haven't tried RBL polishes you really can't understand the fact that they are worth every cent of the $18 price tag.  I was highly doubtful of the promise of bottle color in one coat but its true.  If you are careful in application full coverage of bottle color is possible in one coat.  The swatch above is one fairly thick coat with two coats of Seche as I wanted my nails to be really smooth and glass like.  The first coat wasn't quite smooth enough so I slapped on a second coat before bed.

I adore this nail polish, I treasure the bottle, I seriously take better care of it than I do my normal polish.  The color is deep, highly pigmented and gorgeous.  It looks fabulous with my teal sweater.  That being said it isn't really the same color as the photo on the RBL site.  It is darker and more blue, there is less green.  There is a green tint to it but there is also a heavy dose of ink blue there with a slightly dusty quality.  While is is one of my favorite polishes and I am wearing it for the third time in a month, as Obi Wan Kenobi would say "This is not the the teal you are looking for."  The search continued....

On a side note...
You might be able to tell from the swatch that I have what appears to be tip wear on all of my nails.  I put this mani on late last night, watched some Top Gear on TV and waited for it to dry then tucked myself in for the night.  When I went to sleep my nails were perfect, when I woke up there was a very slight white rim on all my nails.....shrinkage!  ACK, shrinkage on a RBL mani!  What a waste of a perfectly beautiful polish.  I am pretty sure the culprit is the two coats of Seche as used it last week on a glitter and had a similar result (though much more extreme).  Has anyone else had issues with shrinkage using Seche or combinations of certain topcoats and RBL polishes?  I would really like to leave this polish on for several days but the appearance of tip wear is going to result in me taking it off fairly soon.

Teal Appeal

When I was 21 a family friend asked my sister and I to be bridesmaids in her wedding.  We were of course honored and excited as this would be the first wedding we were part of the bridal party.  Months past and several fittings later we were both the owners of teal bridesmaids dresses.  It was a shinny taffeta fabric, off the shoulder, fitted to the waist with a VERY full tea length gathered...skirt with a bow.  A typical bridesmaid's dress for the mid nineties.  Unfortunately the style was the worst possible style for me, I was too busty, the skirt made my butt look much larger than reality and the skirt hit the widest part of my calf.  Since then I have always associated teal with that dress and avoided it, that is until last fall.  In October I found a beautiful peacock teal cowl neck sweater that looks fabulous on me.  I am in love with this sweater, as a result I am now totally infatuated with the color teal.

In the hopes of finding the perfect polish to match my sweater, or at least convey the happy feeling I have when I don the sweater, I began a search for the "perfect teal" creme.  I wanted a creme originally because I was also obsessed with cremes at the moment due to an encounter with CG China Rouge, but that is a different post.

Monday, January 25, 2010

Sinful Colors Fall '09 Haul - Part 2

Day 6 of swatching Sinful Colors...

All I have left are pearl/frosts and glitters in clear bases.  I bought the frosts thinking I might be able to Konad with them before I realized how thin and sheer most of these polishes are.  I wasn't particularly excited about testing these out but I figured they would be a good base to Konad over.


Social Ladder is a sheer pale pink with a slight iridescent shimmer.  It takes 3 coats to achieve bottle color and I still had visible nail lines.  If I was looking for a sheer nude color or for something to use like a CND effect this would be a decent choice.  It is a however streaky and doesn't apply evenly. 

Social Ladder 3 coats with top coat

Tokyo Pearl is a creamy white pearl that is extremely streaky.  I mean streaks galore.  Even after three coats I still had obvious brush strokes and had already developed bubbles.


Tokyo Pearl 3 coats with top coat

Next is Out of This World which on the first coat had potential to be out of this world, it is a sheer silver base with tiny micro glitter that is very sparse.  The microglitter is silver iridescent and in certain lights looks like a holo.  Unfortunately once you put a 2nd or 3rd coat on it just looks like blah silver polish with some lumpy bits.  As a sheer over a regular base I think this would be great.


Three coats Out of This World and top coat

All About You is a brassy gold glitter in a clear base.  The bottle is densely packed with glitter but this is not a polish that is going to give you full coverage alone.  I used three coats here and it is still completely sheer though from a distance my nails did look gold.


All About You 3 coats, excuse the smudge these
were fairly thick coats in an attempt to get full coverage
and I smudged one picking up the camera.


Nail Junkie is AMAZING in the bottle, truly amazing.  A mix of chunky turquoise glitter and iridescent hexagonal glitter this polish has glints of gold, pink silver and green when it reflects light.  It gives full coverage in three coats though there is a visible nail line in bright light and the occasional bald spot, with four coats this could be covered up.   Sounds great right?  It should be but on me it is just....off.  I don't know if its the color or the texture or what but this polish looks awful on me.  I look at it in the bottle and LOVE it, I put it on and bleech.  I think I will try one coat off it over a really dark purple like OPI Siberian Nights and see if that makes it usable.  Right now its in my Franken supply drawer.


Nail Junkie 3 coats.  I know my cuticles have polish
on them...its hard to get motivated to clean them
when the polish looks so bad I know I am taking it off.


So 10 bottles of Sinful Colors late and I have learned to be a bit more selective with my drug store purchases.  Some of these I love and some were a complete disaster.  I did see two bottles on the display last week that look like duochomes so I will probably be stopping back as Walgreens for a new haul sometime soon.


Sunday, January 24, 2010

Rationalization, "Woman Logic", and the No Buy

So it has a full week since I decided that I am on sort of a No Buy until I swatch everything I already have.  It's a sort of  No Buy because I had a Sally Beauty coupon for a free China Glaze with purchase of a bottle of Seche Quick Dry.  I am of the opinion that top coat and base coat don't count on a No Buy, I mean they aren't for pleasure they are necessities.  Right?  Look I know that I live in a world of screwed up logic, my husband calls it Woman Logic.   For example, the classic buy one get one deal.  If I buy a pair of shoes for $60 and can get another pair for half off in my mind I saved 30 bucks.  Makes sense to me, come on you know it makes sense to you too.  In reality I just spent 90 dollars, which incidentally is a lot of nail polish.

Its really irrelevant anyway, because I fell off even my interpretation of the No Buy wagon while at Sally and bought a bottle of CG Stroll and a Sally girl bottle of Shy.  Both were on the clearance table, though I think I saved 70 cents total on both.  I also picked up a bottle of CG Dorothy Who as my freebie with the Seche....and while I was there I splurged on a glass nail file.  I have been having real issues with my nails splitting lately and as I am sure you have seen my normally dry cuticles are HORRIBLY cracked and ragged.

In a normal week I change polish about three times.  In the past week I changed my polish over ten times while swatching the Sinful Color Fall Haul and the ones here.  I think my fingers need a weekend off from acetone.  Maybe I will go look for a new acetone free remover....

Enough rambling, time for the swatches!


Three coats of Dorothy Who and top coat

China Glaze Dorothy Who has been reviewed pretty much everywhere and recently has been getting a lot of comparisons to OPI Absolutely Alice.  From looking at online swatches it looks like Dorothy is more of a medium blue with blue and silver glitter while Alice has gold and what looks like dark blue glitter in addition to some turquoise.  I picked up my bottle of Dorothy and had to wait an ENTIRE week to swatch due to my self-imposed week of Sinful Colors polishes.  It sat in my bathroom drawer taunting me.  When I finally pulled out the bottle and looked at it today I was expecting a true medium blue with silver glitter, at least that's what it looked like in the bottle.  What I actually have on my nails is more of a dark turquoise with some darker blue and silver glitter. I compared it to swatches online and my nails look much more turquoise than those on my favorite blogs.  Not that I mind, I was happily surprised as I am obsessed with all polishes teal and turquoise.

The polish applied smoothly though a bit thick and I was surprised to have full coverage at two coats.  I did a third coat as my nails still weren't bottle true, they still are not after 3 coats and a layer of top.


CG Stroll 3 coats and top coat


CG Stroll reminds me a lot of Ruby Pumps because it is a jelly with glitter.  The color is a deep raspberry wine and the glitter looks gold in some light and raspberry in others.  I couldn't find a magnifying glass to see if the gold was just covered with polish or there are two types of glitter in the bottle.  The glitter seems to be smaller than the glitter in Ruby Pumps and the overall finished look isn't as....well jelly as Ruby Pumps.  The glitter in Stroll seems to lay on the nail rather than the suspended look of Ruby Pumps.  The color is rich and beautiful though and application was smooth.  I see this becoming a fairly popular dark red/berry in my stash.

And last (and certainly least in my opinion) is a Sally Girl mini polish called Shy.  You know those 99 cent minis by the register at Sally Beauty?  I never buy them but it was on clearance and I had just read a mannequin hands article sooooooo.  I understand the point of mannequin hands I can even see wearing a pale nude polish to some events (i.e. as a bridesmaid, at a very stuffy black tie event, job interviews) but I really haven't gotten into the whole movement yet.  I mean I wore nude nail polish when I bit my nails and they were ugly, they aren't pretty now but I'm not biting them so bring on the color.  On the other hand my fingers are STUBBY, so I figured I'd give it a shot. Technically this polish is a shimmer rather than a  creme but the bottle was so tiny it was hard to tell at the store and to be honest if I am going to wear something so boring it can at least be shimmery.  Application was really good and this is only two coats.


Shy 2 Coats with top coat

Sunday, January 17, 2010

Sinful Colors Fall '09 Haul - Part 1

So my very first nail polish haul was 10 bottles of Sinful Colors from Walgreens.  I immediately used one to Franken.  I really don't like how these apply so I have been avoiding swatching them but am making a concerted effort to use everything I own at least once before buying more.

See You Soon is a black base with a teal microglitter.  In the bottle it looks almost like a dark teal shimmer but once you start painting you see the black polish and the shimmery glitter.   It applies fairly unevenly unless you use A LOT of polish on the brush.  I had bald spots and clear brush strokes after one coat.  A second coat and a layer of top coat takes care of these problems though.  In side it looks darker and more shimmery but in direct sunlight the glitter is really pretty.  I have worn this polish more than once despite the fact that it is a bit of a pain to apply and the fact that I have several polishes in the same color family.  I'm a Cowboys fan and while the color isn't quite right this has become my stand by for game day, though I admit that I typically Konad over it.

Sinful Colors See You Soon - 2 Coats and topcoat


I'm not really sure how to describe Mercury Rising.  Is it burgundy? Is it brown?  Is it bronze?  The answer is really yes to all of them.  There is definitely burgundy and dark red microglitter/shimmer in the base polish but that base is a bronze brown color.  It is beautiful when on though .  In doors it looks almost conservative but there is something that just keeps you looking at it.  When it catches the light though it just glows!  I keep looking at my nails and thinking how pretty it is.  I really want to put gold glitter on it or Konad an antique gold over it but I am refraining until I have had it on at least a day.  The Mercury Rising seemed to apply more opaque than a typical Sinful Color polish but once I was outside I notice VNL with only 2 coats so next time I wear this I will have to do three coats.

This shows two coats of Mercury Rising and a topcoat in sunlight. 
I didn't notice the VNL indoors but its pretty obvious here.

I am not in love with I Love You.  I don't know if it is even worthy of the "lets just be friends" status.  The first time I applied this polish I had such high hopes only to be utterly disappointed by the formulaThe polish itself is a purple jelly with purple glitter.  In the bottle it is a truly majestic purple, bright and glittery and holds a ton of promise.  Once you start painting though the problem becomes evident quickly...it is SOOOO thin.  The first time I tried this color I got 4 coats on and waited an hour, it never seemed to harden so I took it off.  I figured I had a bad combination of base/polish/top so I put it in a drawer to try later.

My second attempt It took me 4 coats to achieve bottle color and prevent VNL and by then it was really thick.  Combining that with the requisite Seche topcoat (I can't stand the bumpy texture of glitters) I looked like I had armored nails.  Ordinarily the thickness of a glitter polish doesn't bother me too much but there were other issues with I Love You.  Namely the color.  It was just too....bright?  It was almost garish.  I asked my nail polish buddy what she thought and her response described it perfectly.  It looked cheap...I mean it WAS cheap but I didn't want it to look cheap. On a positive side, it was possibly the shiniest glitter I have ever used and since it was 4 coats all the glitter blended together in the sun to look like a purple chrome. From arms length it looked like a purple chrome minx.  After swatching this I had to do something to tone the polish down a bit so I grabbed my WnW Black Creme and Konad plate M65 and subdued the violet glare a bit.


Sinful Colors I Love You 4 coats and top coat.  It is FAR brighter in person

Sinful Colors I Love You; WnW Black Creme M65

On a side note I had a disturbing amount of shrinkage after finishing this manicure.  Within three hours of this photo the tips of ALL ten nails had pulled back and exposed about 0.5mm of nail tips.  I am not sure if this was because I used Seche or the polish formula or just the thickness of the polish (6 coats total with base and topcoat). 


Fire Red is a typical red shimmer and was surprisingly easy to apply.  I have actually worn this polish a few times now and it goes on easy and wears about the same as a typical CG creme polish.  It is not fire red though, its a dark red, not vampy or anything just not true red and it has no orange undertones that I can see.  I really like to Konad black fishnet over this one.  Actually I did that immediately after taking this photo but then I forgot to take a picture of the final product.

Fire Red 3 coats and top coat

Disclosure Policy

This policy is valid from 17 January 2010

This blog is a personal blog written and edited by me. For questions about this blog, please contact  pigmentsandpotions@gmail.com.

This blog accepts forms of cash advertising, sponsorship, paid insertions or other forms of compensation from the google ads placed on the site.  I do not select these ads and do not endorse the products selected by google.

The compensation received will never influence the content, topics or posts made in this blog. All advertising is in the form of advertisements generated by a third party ad network. Those advertisements will be identified as paid advertisements.

The owner(s) of this blog is not compensated to provide opinion on products, services, websites and various other topics. The views and opinions expressed on this blog are purely the blog owners. I am not a licensed cosmetologist or a trained chemist.  Any information in this blog is provided based on my own personal experience.  I am not responsible for any reactions to products or mixtures described on this site.

This blog does not contain any content which might present a conflict of interest.  If I receive products from sources for review I will indicate that those products were provided for review and were not purchased by myself.

To get your own policy, go to http://www.disclosurepolicy.org

Thursday, January 14, 2010

Purple Slate

I am constantly on the look out for a perfect purple creme, I still am not sure what that is or how to describe it but I am always willing to give a purple creme a shot as long as it isn't to grapey. Last week I thought I had discovered my match in OPI Siberian Nights only to get it home and realize it was much darker than I was anticipating. It was almost black by the second coat. I decided to experiment with some of the random polishes in my stash and try to come up with something somewhere between purple and black rather than just a really dark purple. Somewhere between charcoal and purple. Charple? Purcoal? I'm not really sure what I was going for except that I wanted it to look like dusty plums.
Materials:
  • China Glaze Up All Night
  • Rimmel Celebrity Bash
  • WnW Black Creme
  • Color Club French Tip
  • Empty 0.5 oz bottle
  • ballz


  1. I started by filling the empty bottle ~1/4 full with CG Up All Night, this is a REALLY dark blue so I needed to lighten it up a bit to see what I was doing.
  2. Added 1/4 French Tip and shook well. This was too much, 20 -30 drops would have probably been enough.
  3. Next I added 1/4 bottle of the Celebrity Bash which made a light medium blue purple.
  4. Finally I added ~30 drops Black Creme shaking every 5 drops or so until I had obtained a darker grey purple color.
  5. After testing the color I added a little Sally Hansen Hard as Nails to thin the resulting mixture. It applies fairly smooth but does leave bald spots on the first coat, though that may be the brush as much as the polish.
Results:
I haven't named this polish yet, it is a cross between slate grey and eggplant. Its fairly dark in artificial light and much more purple in sunlight.


I found it pretty hard to photograph this color,
it is more dusty purple less blue in person. 


Always remember that nail polishes don't always play well with each other.  If you are going to play mad scientist proceed at your own risk and use proper safety procedures....yes I am a science teacher.  I am not suggesting that frankening is risk free and my franken recipes are just me recounting how I mixed up my latest potion. I take no responsibility for your mad scientist experiments. 

Monday, January 11, 2010

My first Franken - Longhorn

The week after I my entry into the strange new world of polish I found myself in a Walgreens buying a Diet Coke and some aspirin after a long day helping friends move. I had a grand total of 6 polishes to my name. Well that is until I stumbled into the cosmetics section and discovered the Sinful Colors display, two for $3.00. I bought ten.

The next day I discovered that many of these polishes applied unevenly or left a visible nail line (which I can't abide by). A quick trip to Sally and a few dollars spent on glitter and tiny funnels later and I was set to make the best of what I had.

I decided to start with the Serena and Chloe as I loved the color but it was way to sheer and uneven when painted.

Here is what I started with:
  • 1 bottle of Sinful Colors Serena and Chloe
  • 1 bottle of Sally Hansen Insta-Dri Uptempo Plum
  • 1 container of Sally Girl Sparkle Effects Gold Digger
  • 1 small plastic funnel (purchased at Sally)
  • 1 empty 2 liter bottle
  • stainless steel BBs (ballz)
I don't have a photo of Serena and Chloe as I forgot to
take one before I began mixing.

So this was kind of a spur of the moment experiment and I didn't take any photos of the before polish (but google shows some good swatches).

My goal was to make the base of the Serena and Chloe more densely pigmented so it wouldn't be so sheer. I also wanted to experiment with the glitter. The 2L was necessary as I wasn't really equipped to Franken at the time.
  1. I poured about 1/5 of the Serena and Chloe into the empty bottle (hey I needed a place to get rid of it and it was handy).

  2. Added 10-12 drops of the Uptempo Plum, I really wanted to use black but again I wasn't really prepared and this was available and pretty close to black.

  3. Mixed in 1/3 of the gold glitter.

  4. Added 2 ballz.

  5. Shake, shake, shake. My husband spent like 40 minutes shaking for me.

Results:


The resulting polish is almost University of Texas burnt orange, its a tad bit more rust colored. The glitter is dense and the base is darker but it still really looks best with 2- 3 coats. It dries REALLY quickly and needs at least one coat of a fairly viscous topcoat. I use a nice thick coat of Seche. I LOVE the results, it is amazing in fluorescent light and sunlight. This polish really changed my mind on glitters. I really prefer shimmers as they aren't as lumpy when they dry but this came out amazing.

Always remember that nail polishes don't always play well with each other.  If you are going to play mad scientist proceed at your own risk and use proper safety procedures....yes I am a science teacher.  I am not suggesting that frankening is risk free and my franken recipes are just me recounting how I mixed up my latest potion. I take no responsibility for your mad scientist experiments. 

Down the Rabbit Hole, How I Became a Nail Polish Addict

I'm still not sure how I came to be writing this. I mean what am I doing writing about nail polish, how have I become addicted to nail polish and nail art....I bite my nails.

Ok I don't bite my nails any more, but I did until two months ago. That's when a friend lent me a bottle of her OPI designer series and told me to paint my stubs. So there I am painting my bitten to the quick nails in this beautiful cornflower blue holo. They looked nice but no magic, no magic until the next day when I went to a football game....then BAM. The sunlight reflecting off the holo was enough to have me hooked.


OPI Glamour DS, you have to excuse the smudges,
my manicure skills are still in their infancy.


The next day I began my trip down the rabbit hole of nail polish addiction. Along the way I rediscovered my inner child, you know that four year who mixed all of the shampoos and conditioners together in the bathtub? Yeah well that kid is back with a vengeance....I love teal, cremes and frankening. Is frankening even a word? It is now.